


Mixing Instructions: Soap Saturdays
To start off this post, let me say a big, fat, I'M SORRY for not getting this Soap Saturdays article out sooner. It's been 5 weeks since the last Soap Saturdays article about choosing a recipe. This week's post was VERY labor intensive between getting the soap made (not a small feat with two toddlers in the house), taking pictures, writing the post, editing (over and over) and getting it all in a readable format.
[row] [oneThird]
In the last week of Soap Saturdays articles, I gave a simple 5 bar soap recipe from Susan Miller Catvich's book titled, The Natural Soap Book - Making Herbal and Vegetable Based Soaps. In her book, the recipe makes 40 bars, but I've configured it down to a smaller batch size for anyone who wants to try just a small batch. To the right is her recipe from the book:
[/oneThird] [oneHalf] Soap Essentials Bar (5 Bar Batch):
|
[/oneHalf] [/row]
[row][oneFourth]As you can see, to make cold process soap, you need 3 basic ingredients: fats or oils, sodium hydroxide (lye), and a liquid.[/oneFourth] [oneFourth] Usually coconut oil is solid at room temperature, but mine was stored in a warm room.[/oneFourth][oneFourth]
 [/oneFourth][oneFourth]
 Ice, water, and sodium hydroxide.[/oneFourth]
[/row]
[row][oneFourth][/oneFourth][oneHalf]
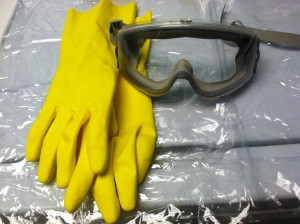
This week, we are going to go over mixing instructions. These instructions are for making cold process soap, and apply to any size batch. Please remember to always wear goggles, and gloves while mixing your soap.[/oneHalf][/row]
[row][oneFourth]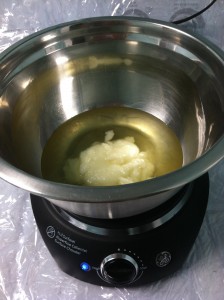
Melting the coconut and
palm oils together.[/oneFourth]
Step 1.) Gently heat any fats/oils that are solid at room temperature, until there are only a few small chunks remaining in your pot. Turn your heat off, letting the pot sit for just a few minutes longer until all the chunks of fats/oils are melted. For the recipe above, this would be melting the coconut oil and palm oils together until they are liquid. If your oils once melted, are over 80° F., you'll need to cool the oils down by placing your pot in a cold water bath until the temperature is correct.

|
| Adding the olive oil to the melted oils. |
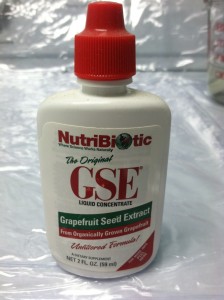
Once the fat/oils are close to 80° F., add your olive oil and the Vitamin E (squeezed out of the gelcap), or grapefruit seed extract.
Continue cooling your coconut/palm oil/olive oil/Vitamin E mixture until it reaches 80° F. If the temperature gets too cool, put your pot back on the stove and watch it carefully until you get it the desired temperature.[/row]
[row]
[oneFourth]
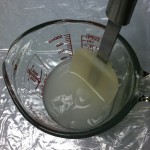
Adding the sodium hydroxide to the ice water. Always add the lye to your liquid, and not the other way around![/oneFourth]
[oneHalf]Step 2.) You can mix your liquid/lye solution while your solid-at-room-temperature fats/oils are being melted. Always add lye (sodium hydroxide) to your liquid, never the other way around. Add your lye 1/3 at a time, carefully monitoring your temperatures with your thermometer. If you are using water, lye will heat it quickly and produce fumes. I used 4 oz. of ice cubes, and 2 oz. of water (to equal the recipe's required 6 oz. of liquid) to cool the lye faster than just using cold water.
You may need to leave the room and come back a few minutes later to finish mixing your liquid and lye, due to the fumes. Cool your liquid/lye solution down to 80° F. If the temperature goes lower than 80° F., you'll want to gently heat the mixture until it reaches 80° F.
If you are using raw milk (unprocessed, literally straight from the cow/goat/other source), you'll want to freeze your milk first, thaw it slightly, and then add your lye into your frozen milk a little at a time. Keep a bowl of ice water underneath your bowl of milk while adding the lye, to be able to control the temperature easier. In case you splash or spill sodium hydroxide (lye), the sodium hydroxide/liquid mixture, or raw soap in the mixing process, keep white vinegar handy to dab on the area affected. White vinegar will neutralize the sodium hydroxide.
[/oneHalf]
|
| Mixing the sodium hydroxide with the ice water. It melts the ice quickly, and looks cloudy first before becoming clear. |
[/row]

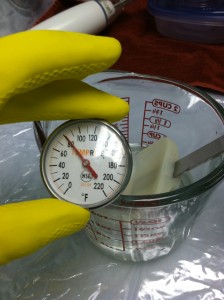
|
| The oils are ready at 80 degrees |
|
| The sodium hydroxide and water mixture is ready at 80 degrees. |
Step 3.) When your lye/liquid mixture is cooled down to 80° F. (same temperature as your fats/oils mixture), you are ready to mix everything together. To avoid splashing while mixing your liquid/milk mixture into your fats/oils mixture, pour the liquid/lye mixture onto a spatula that is tilted downwards into your pot of fats/oils, letting it run off the spatula into the pot.
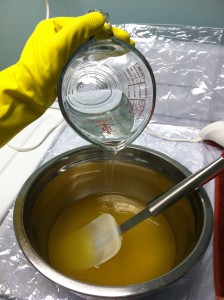
|
| Pouring the sodium hydroxide mixture into the olive, coconut, and palm oils. |
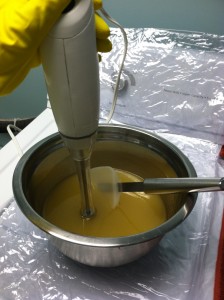
|
| Mixing. The mixture looks very oily at first. |
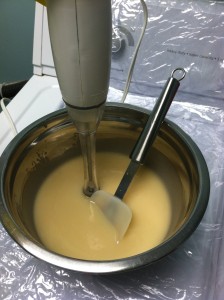
|
| The soap becomes thicker with stirring, and begins to look creamy |
Step 4.) Using a stick blender, blend everything together. You'll see your mixture going from an oily mix, to a thickened custard type mixture. This mixing time will vary depending on the types of oils you used to make your soap, and can even vary from the different types of olive oil you use.
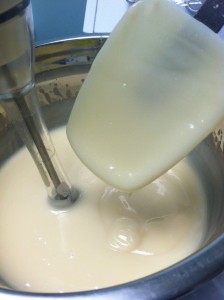
|
| Soap is "tracing" into a small pile. Ready for pouring into the mold. |
After a few minutes of mixing, stop blending and check your soap. Pick your spatula up out of the mixture and drizzle a little on top. If it draws a pattern, leaving the drizzle on top, you've reached trace. Trace is where you can literally trace a design on top of your soap, and it stays there for a minute or two. If the drizzled part sinks back into your soap pot, you need to mix longer.
Step 5.) Once you've reached trace, you are ready to add your essential oil, fragrance oils, or other nutrients (clays, oatmeal, nuts, honey, herbs, etc.). If you are mixing something dry (like clay or oatmeal) into your soap, pour a little soap into a separate bowl, add the dry nutrients to that small portion, mix until it is all incorporated, and then pour it all back into the main soap pot and mix thoroughly together. It'll mix more completely that way.
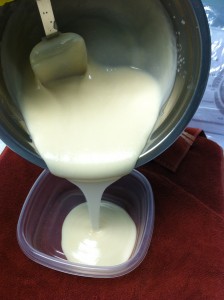
|
| Pouring the soap into the mold. |

|
| Leave the soap in a safe place to set for 24 hours. |
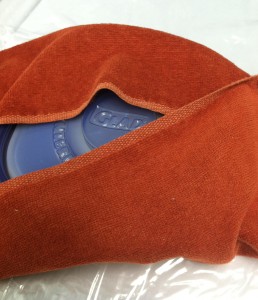
|
| Cover the soap in old towels or blankets for the first 24 hours. |
Step 6.) Pour your freshly made soap into your prepared mold, and level it out as much as possible.
Put a cover over your mold, and then wrap your molds in old blankets or large towels to help keep the soap at an even temperature for the first 24 hours.
Step 7.) After 24 hours, remove the towel/blanket and the cover from off your soap. The soap may or may not be ready to pop out or cut out of the mold. Usually I wait for another 24 hours after uncovering the soap before I cut it out of the mold. You'll know it is ready when it resists pressure when you touch it. This may take up to 3 days. For smaller, more detailed molds, you might need to put the soap in a freezer for up to 2 hours, to get it firm enough to pop out cleanly. Your soap will probably have a white colored "ash" on top. This is completely normal. It is simply the oxidation process (like the browning of an apple that has been bitten into), of the soap touching air in the first 24 hours. You can trim the ash off if you want a cleaner look.
 NOTE: To clean your equipment after making your soap, simply use hot water and plenty of dish soap.
Step 8.) Once your soaps are out of the mold, cure the pieces for 4-6 weeks, turning the soaps halfway through to ensure even curing on all sides. Leave enough room between all the soaps (I like about 1" of space) to let air flow freely around the soap as it cures.
Step 9.) After the 4-6 week curing period is complete, you may enjoy your soaps!
**Horse 'O Peace Ranch is not responsible for personal injury or damage to personal property, due to inappropriate handling/usage of chemical or mechanical components.**
To read the previous Soap Saturdays posts: